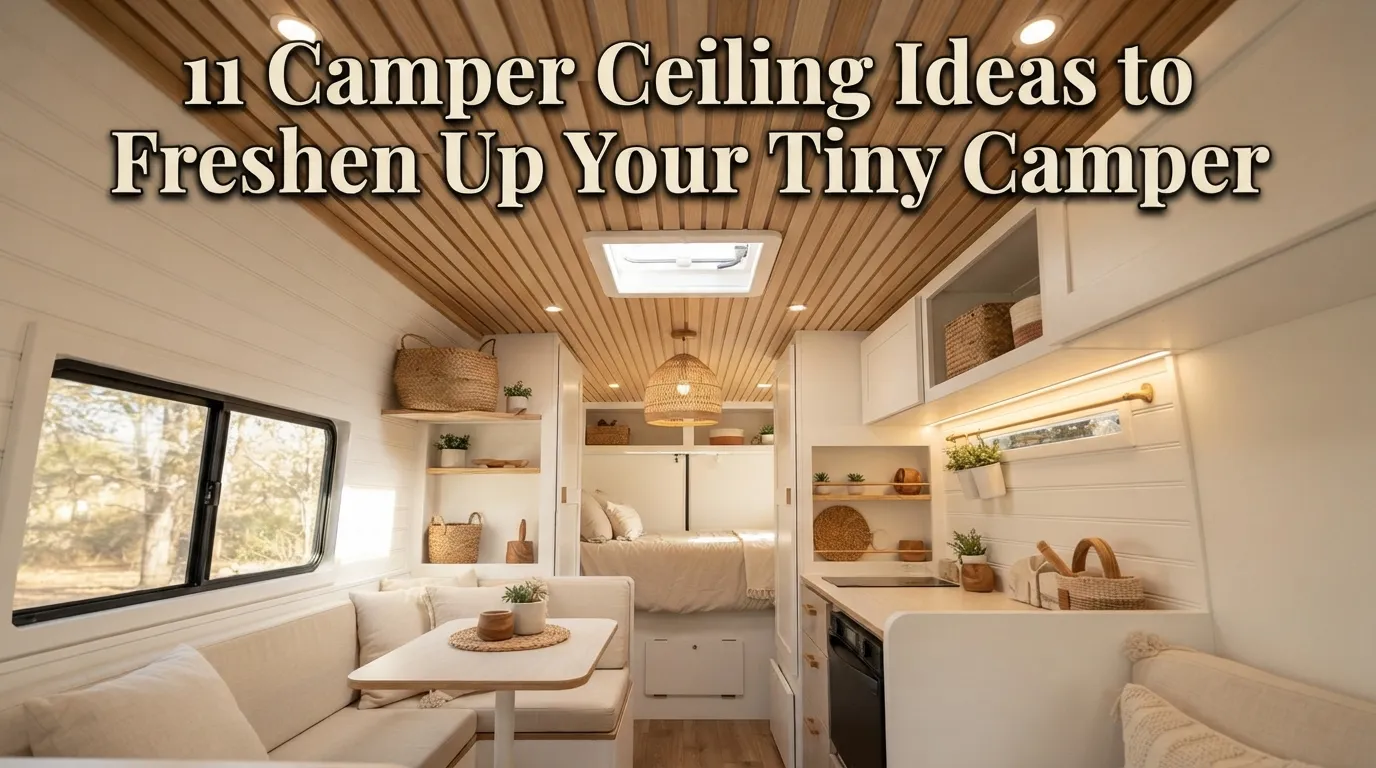
11 Camper Ceiling Ideas to Freshen Up Your Tiny Camper
The ceiling is one of those camper details that is surprisingly easy to overlook. We spend so much time thinking about cabinets, seating, bedding, curtains, and wall decor that the fifth surface in the room often gets left completely alone. But in a tiny camper, the ceiling can have a major effect on how the entire interior feels.
A dated, dark, stained, or overly plain ceiling can make an already-small camper feel closed in. On the other hand, the right ceiling treatment can make the interior feel brighter, warmer, taller, and much more intentional. You don’t necessarily need a major renovation, either. Simple changes such as lightweight wood-look panels, a fresh coat of paint, subtle wallpaper, or decorative ceiling planks can create a noticeable difference.
The key is choosing an option that looks beautiful while still respecting the realities of a camper. Weight, moisture, ventilation, cleaning, installation, and the existing ceiling structure all matter. A material that works perfectly in a traditional house may not be the smartest choice inside a moving RV.
In my experience, the best camper interiors balance personality with practicality. You want the ceiling to complement your cabinets, flooring, upholstery, and lighting rather than compete with them.
Whether you’re updating an older travel trailer, refreshing a tiny camper before a road trip, or simply want your RV to feel more like home, these ideas can help you rethink the ceiling as part of the overall design.
From warm wood-inspired finishes to bright white surfaces and subtle modern treatments, these camper ceiling ideas offer plenty of inspiration for creating a cozy, polished space without making your tiny camper feel visually crowded.
Table of Contents
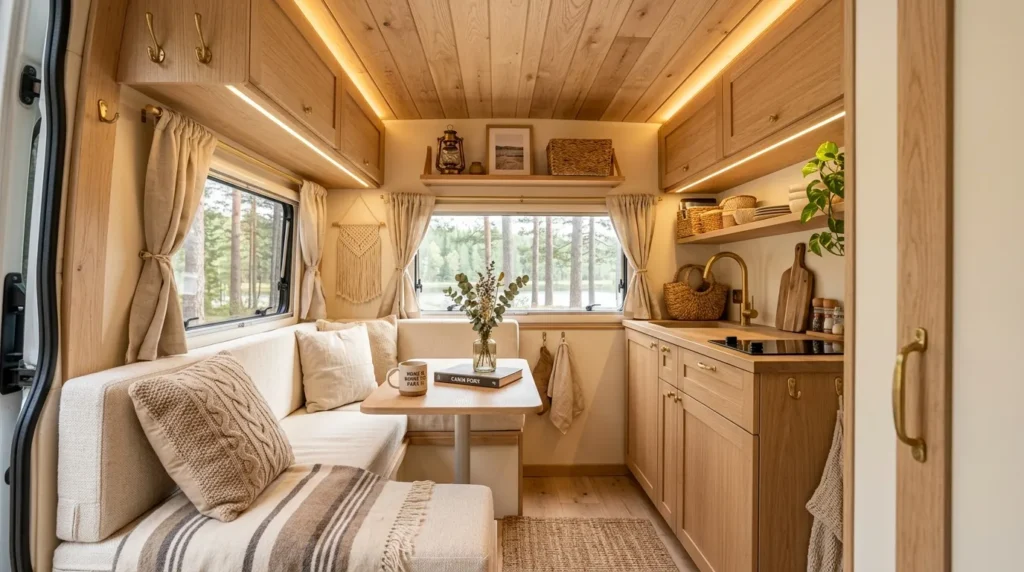
1. Warm Wood Planks
Add natural warmth and cabin-inspired character with lightweight wood-look ceiling planks.
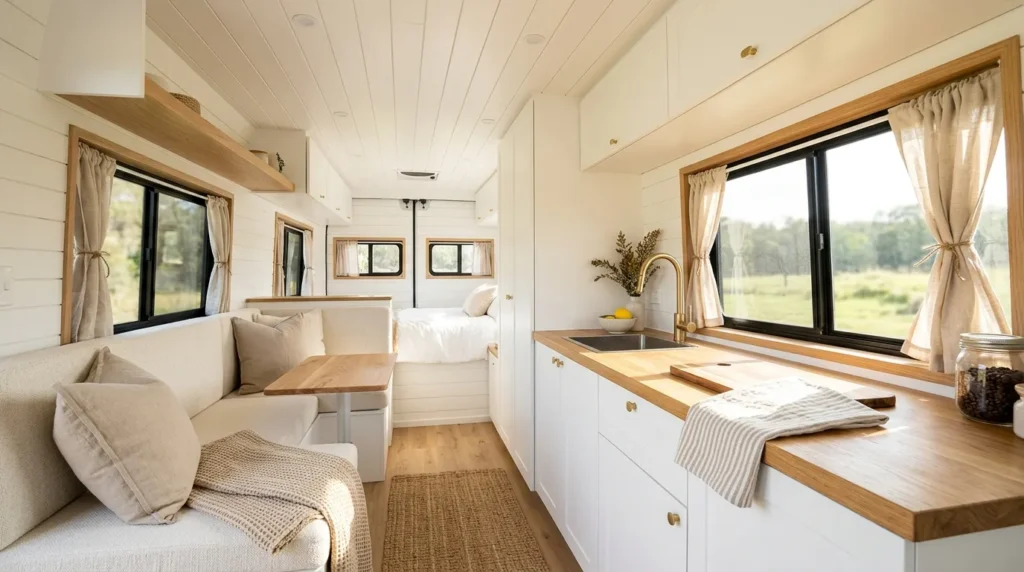
2. Crisp White Panels
Brighten a compact camper with a clean white ceiling that reflects available light.
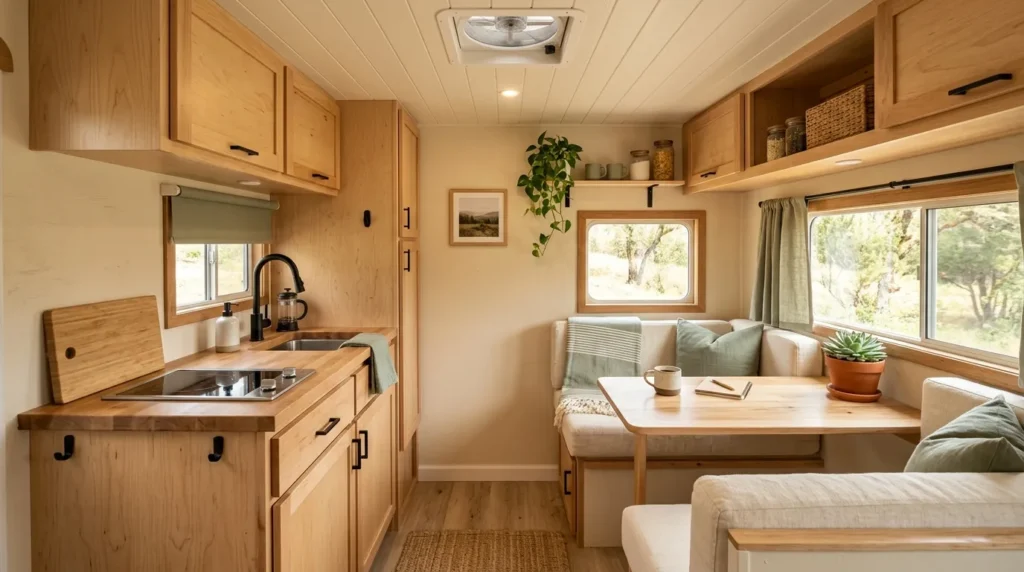
3. Painted Ceiling Finish
Use paint to refresh an outdated ceiling while keeping the renovation simple.
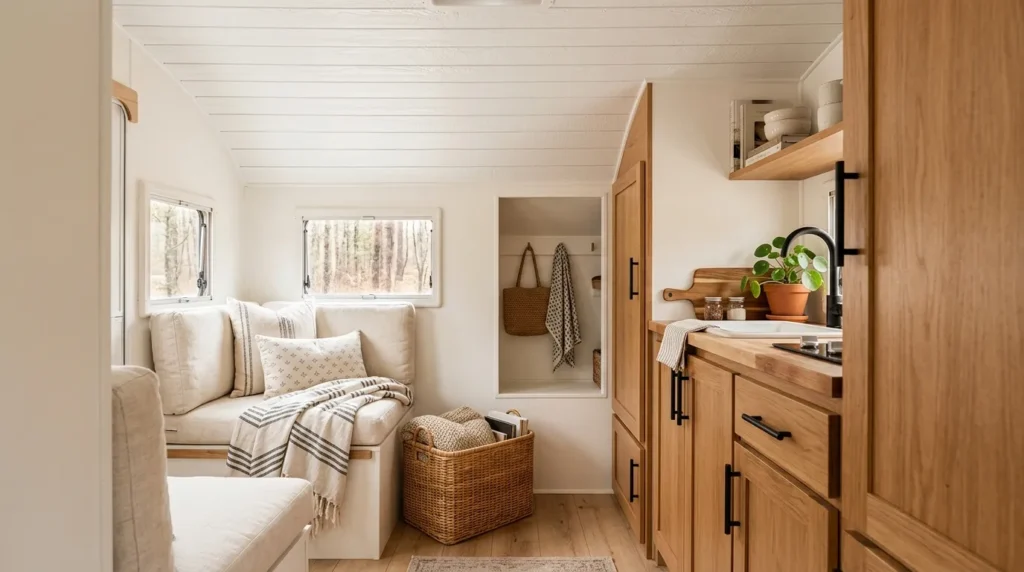
4. Lightweight Shiplap
Introduce farmhouse character with lightweight shiplap-inspired ceiling panels.
5. Natural Bamboo Texture
Bring an organic, relaxed feeling into the camper with bamboo-inspired materials.
6. Subtle Wallpaper
Create a decorative ceiling with a lightweight, understated wallpaper pattern.
7. Modern Slatted Ceiling
Add architectural interest with narrow slats and carefully planned spacing.
8. Soft Neutral Panels
Create a calm, seamless look with warm neutral ceiling materials.
9. Rustic Cabin Finish
Give the camper a cozy getaway feeling with rustic wood-inspired details.
10. Reflective Bright Finish
Make a tiny interior feel lighter by choosing surfaces that help bounce available light.
11. Layered Lighting Detail
Use the ceiling as an opportunity to combine a refreshed finish with better lighting.
1. Warm Wood Planks
Quick Benefits
- Adds warmth to a small camper
- Creates a cozy cabin atmosphere
- Works beautifully with neutral interiors
- Adds visual texture without wall clutter
- Can complement existing wood cabinetry
Why It Works
Warm wood is one of the easiest ways to make a tiny camper feel cozy and connected to the outdoors. A wood-plank ceiling draws the eye upward while introducing natural-looking texture that can soften the appearance of standard RV finishes.
The important consideration is weight. In a camper, you don’t want to automatically use the same heavy materials you might install in a traditional home. Lightweight wood-look panels, thin planks, or RV-friendly alternatives can provide a similar visual effect while being more practical for a moving space.
The color matters, too. Pale oak, natural pine, whitewashed wood, and light honey tones tend to work better in small campers than very dark finishes. A darker ceiling can sometimes make a compact interior feel lower.
I’ve noticed that wood looks particularly attractive when it connects visually with existing cabinetry or flooring. You don’t need every wood tone to match perfectly; the goal is simply to create a harmonious palette.
How To Style It
Begin by choosing a lightweight ceiling material in a warm natural wood tone. If your camper already has medium or dark cabinets, consider a lighter ceiling to prevent the interior from becoming visually heavy.
For a modern cabin appearance, use clean, narrow planks with minimal visible variation. For a more rustic atmosphere, slightly more textured wood-look panels can add character.
Pair the ceiling with cream upholstery, beige textiles, warm white walls, and simple black or bronze hardware. If you have exposed ceiling lighting, choose fixtures that complement the wood rather than competing with it.
Avoid adding too many rustic elements below the ceiling. A few woven baskets, neutral pillows, or a small wood accent are enough to reinforce the look.
If the camper has limited natural light, keep the wood relatively light and use warm LED lighting. This combination helps preserve the cozy character while keeping the interior bright enough for everyday use.
Before installation, verify the ceiling construction, material weight, adhesive requirements, ventilation openings, and clearance around lights and other fixtures. A beautiful ceiling should also remain safe and practical while the camper is traveling.
2. Crisp White Panels
Quick Benefits
- Makes the camper feel brighter
- Helps visually open a tiny interior
- Reflects available daylight
- Creates a clean, timeless backdrop
- Works with almost any decorating style
Why It Works
A crisp white ceiling can make one of the biggest visual differences in a tiny camper, especially when the original ceiling is yellowed, dated, or visually heavy. Light surfaces reflect more of the available light, which can help a compact interior feel fresher and more spacious.
White also gives you tremendous decorating flexibility. Whether your camper has farmhouse furniture, modern upholstery, colorful accessories, or natural wood cabinetry, a white ceiling can connect the entire interior without competing with those details.
The shade of white matters more than many people realize. A warm white can feel cozy alongside beige upholstery and wood, while a cooler white can create a cleaner contemporary appearance. In most campers, an extremely stark white may feel less inviting than a slightly softened shade.
A mistake many people make is assuming that a white ceiling automatically needs to be completely plain. Subtle panel lines, beadboard-inspired texture, or a lightly textured finish can add dimension while maintaining the bright appearance.
How To Style It
Choose a lightweight white ceiling panel or RV-friendly surface with a smooth or subtly textured finish. If your camper has low ceilings, consider using a finish with minimal visual breaks so the surface feels continuous.
Pair the ceiling with warm lighting rather than harsh blue-toned bulbs. Warm LEDs can make white surfaces feel inviting instead of clinical.
If the camper has wood cabinets, let those become the main source of warmth. Cream cushions, beige curtains, woven accessories, and natural wood details can balance the brightness overhead.
For a modern interior, combine the white ceiling with simple black fixtures and streamlined furniture. For a farmhouse look, white beadboard-inspired panels can work beautifully with soft textiles and rustic wood accents.
Keep the ceiling visually clean around vents, fans, and lights. Plan around those existing fixtures rather than trying to conceal important ventilation components.
If you’re repainting instead of replacing panels, thoroughly clean and prepare the existing surface first and use a coating appropriate for the ceiling material. Always follow the manufacturer’s preparation and ventilation instructions.
3. Painted Ceiling Finish
Quick Benefits
- Provides an affordable visual refresh
- Lets you customize the color
- Works with many existing ceiling materials
- Can hide minor cosmetic discoloration
- Makes an older camper feel more updated
Why It Works
Paint can be one of the simplest ways to transform an aging camper ceiling without changing the underlying structure. If the existing surface is sound and suitable for painting, a fresh finish can make the entire interior feel cleaner and more intentional.
Although white is the safest choice for a small camper, don’t be afraid of extremely soft color. Warm ivory, pale greige, muted sage, or a barely-there blue can introduce personality while keeping the ceiling visually light.
The best color depends on the rest of the camper. If your walls are already warm beige, a slightly lighter ceiling can create a gentle layered effect. If the interior has cooler gray cabinetry, a soft white or pale gray may coordinate more naturally.
The ceiling doesn’t have to be the star of the room. Often its job is to support the larger design by making everything beneath it look better.
Before painting, inspect the ceiling carefully. Look for moisture damage, loose material, staining, or areas that need repair. Paint should refresh a suitable surface rather than conceal an unresolved problem.
How To Style It
For the safest small-space approach, choose a light color with a soft finish. Warm white is versatile, while pale beige or greige can create a cozy designer-inspired appearance.
Use the ceiling color as a subtle connection to the rest of the camper. For example, a warm ivory ceiling can complement cream curtains, beige cushions, and natural wood cabinets.
If you want a little more personality, consider a muted sage or dusty blue, especially if those colors already appear in the upholstery or accessories.
Keep the remaining ceiling elements simple. White or coordinating trim around vents and fixtures can help create a more finished appearance.
Use the correct primer and paint system for the existing surface, and make sure the material is properly prepared before application. If the camper ceiling has a specialized vinyl, laminate, or other finish, verify product compatibility rather than assuming ordinary wall paint will adhere properly.
Allow adequate ventilation while working and follow the paint manufacturer’s drying and curing instructions before closing up the camper.
4. Lightweight Shiplap
Quick Benefits
- Adds farmhouse-inspired character
- Creates attractive horizontal or vertical lines
- Gives the ceiling architectural interest
- Works with neutral camper interiors
- Can make a basic RV feel more customized
Why It Works
Shiplap-inspired ceilings have a naturally cozy quality that works surprisingly well inside small campers. The repeated lines introduce architectural detail without requiring decorative objects that would take up valuable space.
For a camper, lightweight materials are particularly important. Traditional thick wood boards may add unnecessary weight, so look for thin panels or RV-appropriate alternatives that recreate the appearance without the same load.
The direction of the planks can also influence the visual effect. Depending on the layout, lines running lengthwise can emphasize the camper’s long shape, while a different orientation may make a section feel wider.
White shiplap is a classic choice, but natural wood tones can create a warmer cabin atmosphere. A lightly weathered finish can also work if the rest of the interior has rustic details.
The biggest advantage is that the ceiling itself becomes part of the decor. That means you can keep the walls and countertops relatively simple.
How To Style It
Choose narrow, lightweight shiplap-style panels in white, warm ivory, or a pale wood tone. For a modern farmhouse look, pair white ceiling planks with natural wood cabinetry and black hardware.
If your camper already contains several wood tones, a painted shiplap ceiling may provide better balance. It introduces texture without adding another competing color.
Use simple lighting fixtures between the plank lines or position fixtures so the pattern remains visually consistent.
Below the ceiling, repeat the farmhouse feeling through one or two elements such as a woven basket, neutral striped cushion, or small wood accent. Avoid covering the camper with signs and rustic decorations; the ceiling already provides plenty of character.
Pay close attention to access panels, vents, wiring, fans, and lighting. Any ceiling treatment should preserve access to components that may need inspection or service.
For a particularly small camper, choose a lighter finish and avoid extremely wide, high-contrast plank lines. Subtle detailing will give you the farmhouse character without making the ceiling feel visually low.
5. Natural Bamboo Texture
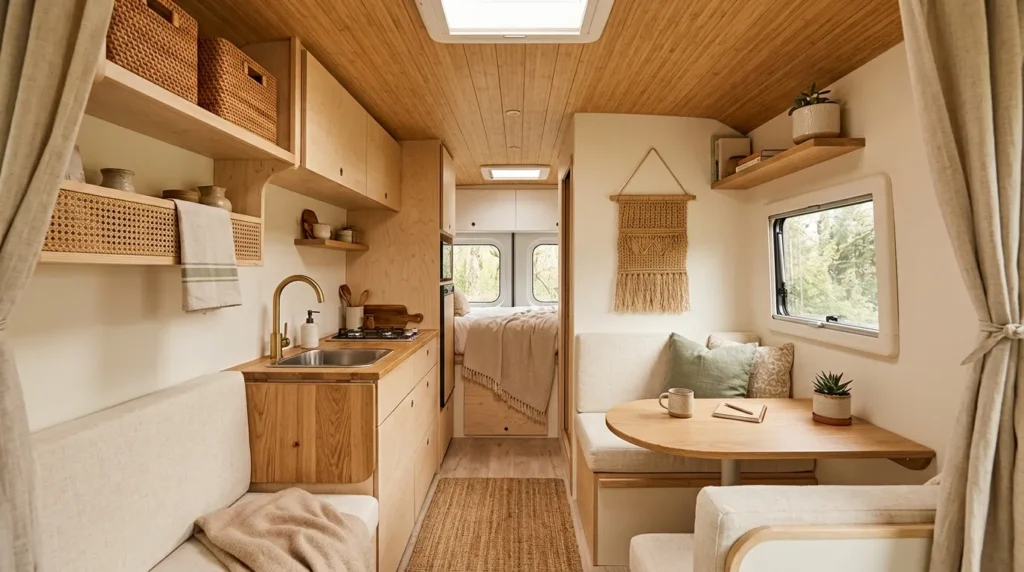
Quick Benefits
- Introduces an organic appearance
- Creates a relaxed travel atmosphere
- Adds warmth without darkening the space
- Works well with neutral decor
- Complements natural wood and woven accessories
Why It Works
Natural textures can make a camper feel much more connected to outdoor living, and bamboo-inspired finishes are an interesting way to bring that feeling overhead. The warm, organic appearance works especially well for campers used for beach trips, camping adventures, national park travel, or relaxed weekend escapes.
Bamboo and bamboo-look materials can provide texture without requiring a heavily decorated interior. The ceiling itself becomes a subtle design feature, allowing you to keep the rest of the camper simple.
The color is another advantage. Light bamboo tones tend to sit comfortably between pale wood and warm neutral, making them easy to pair with cream, beige, white, sage, and muted blue.
As with any camper ceiling project, don’t assume a material is appropriate simply because it looks lightweight. Check the actual product weight, installation method, moisture resistance, and compatibility with your ceiling structure before purchasing.
The best result combines the organic visual quality with practical RV considerations.
How To Style It
Choose a light bamboo-look panel or another appropriately rated lightweight material with a natural woven or linear texture. Avoid overly yellow finishes if you want a more contemporary appearance; pale natural tones tend to feel fresher.
Pair the ceiling with cream upholstery, linen-look curtains, woven baskets, and light wood accessories. A few touches of sage green can reinforce the natural feeling without turning the camper into a themed space.
For lighting, warm LEDs complement bamboo’s natural undertones beautifully. Simple fixtures are preferable because the ceiling texture already provides visual interest.
If your camper has a coastal or bohemian personality, add one or two small accessories that echo the material, such as a woven storage basket or natural-fiber mat.
Keep the overall palette restrained. The combination of natural texture, warm lighting, and neutral textiles is enough to create a relaxing atmosphere.
Before installing any ceiling material, confirm that it is suitable for your camper’s environment and that it will not obstruct ventilation, fans, lights, smoke or carbon-monoxide detectors, or required access points. Practical safety considerations should always come before decorative styling.
6. Subtle Wallpaper
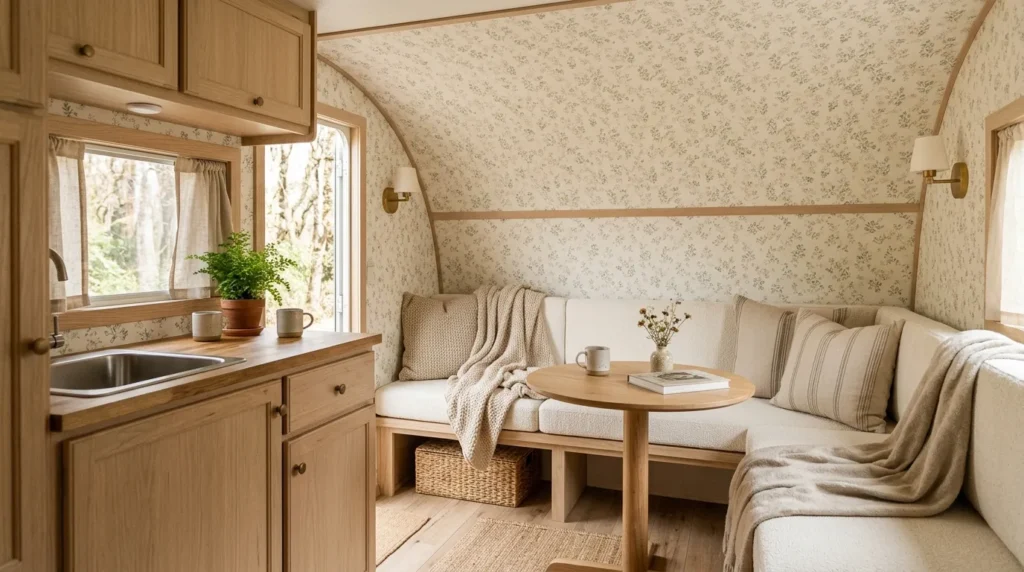
Quick Benefits
- Adds personality without major construction
- Creates an instant decorative focal point
- Offers many pattern and color choices
- Works well with simple camper interiors
- Can introduce texture and visual depth
Why It Works
Wallpaper can be a clever way to make a camper ceiling feel customized, particularly when you want more personality than a plain painted surface can provide. A subtle pattern overhead can create an unexpected design detail while leaving walls, cabinetry, and furniture relatively simple.
For a tiny camper, restraint is important. A small-scale botanical print, delicate stripe, soft geometric pattern, or barely-there texture can add interest without making the ceiling feel visually heavy.
Light colors are usually easier to work with overhead. Cream, warm white, pale sage, soft blue, and light beige can all create a decorative effect while maintaining an airy feeling.
However, wallpaper isn’t automatically suitable for every camper ceiling. The surface needs to be properly prepared, and the product and adhesive should be appropriate for the existing material and the camper’s temperature and moisture conditions.
If the camper experiences significant humidity or temperature changes, product compatibility becomes especially important.
How To Style It
Choose a lightweight, understated wallpaper pattern that connects with colors already present in your camper. A cream background with tiny sage leaves can complement wood cabinetry, while a subtle blue pattern can work beautifully with coastal textiles.
Keep the rest of the interior relatively quiet. Since the ceiling is already patterned, use solid-colored cushions, curtains, and bedding to prevent the space from becoming visually crowded.
For a more modern appearance, consider a soft geometric design with plenty of negative space. For a cottage or farmhouse feeling, a tiny floral or botanical pattern can add charm.
Use warm lighting to soften the pattern and prevent it from appearing too stark at night.
Before installation, test the wallpaper and adhesive on a small inconspicuous area if appropriate for the product. Follow the manufacturer’s instructions carefully, especially concerning surface preparation, temperature, moisture, curing, and removal.
Also plan around vents, fans, lights, and access panels. Never cover components that require ventilation or maintenance access.
7. Modern Slatted Ceiling
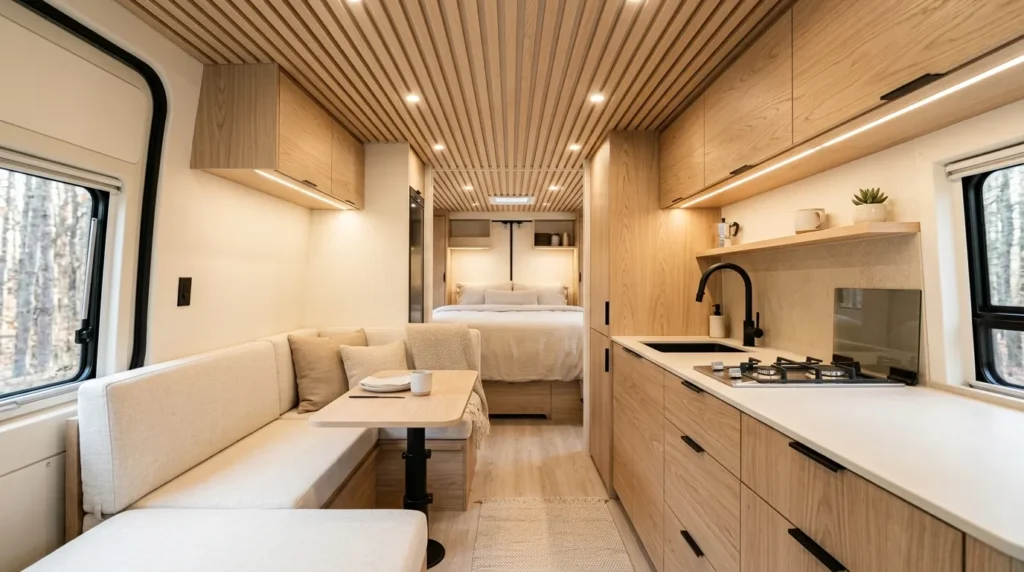
Quick Benefits
- Adds architectural interest
- Creates a contemporary appearance
- Introduces rhythm and texture
- Works well with minimalist interiors
- Can visually emphasize the camper’s shape
Why It Works
A slatted ceiling can make a tiny camper look surprisingly sophisticated. The repeated narrow lines introduce architectural structure without relying on decorative accessories, which is particularly useful when floor and wall space are limited.
The modern appearance comes from simplicity. Rather than using elaborate patterns, the design relies on spacing, repetition, and material contrast.
Light wood slats can create a warm Scandinavian-inspired atmosphere, while white or painted slats can feel cleaner and more contemporary. Combining wood tones with a light background can also create subtle depth.
One of the most important considerations is scale. In a small camper, thick or widely spaced slats can become visually overwhelming. Narrower elements and consistent spacing usually create a more refined result.
As always, the materials need to be appropriate for a moving vehicle. The visual concept can be recreated with lightweight alternatives rather than traditional heavy construction materials.
How To Style It
Use narrow, lightweight slats in a light natural wood tone if you want warmth, or choose painted slats for a more minimalist effect.
Coordinate the wood with one or two existing finishes rather than trying to match every surface. A ceiling in pale oak can look beautiful with slightly darker cabinets because the difference creates dimension.
Keep furniture and accessories streamlined. Simple cream cushions, solid curtains, and minimal countertop decor will allow the ceiling to remain the architectural focal point.
Matte black lighting fixtures can provide a contemporary contrast against light wood. Warm brass can create a softer, more upscale feeling.
If the camper has a long narrow layout, consider how the direction of the slats interacts with the room. Lines can emphasize the length of the interior, so use the orientation intentionally.
Leave adequate clearance around lights, fans, vents, and other fixtures. The finished ceiling should look seamless while still allowing important components to function and remain accessible.
8. Soft Neutral Panels
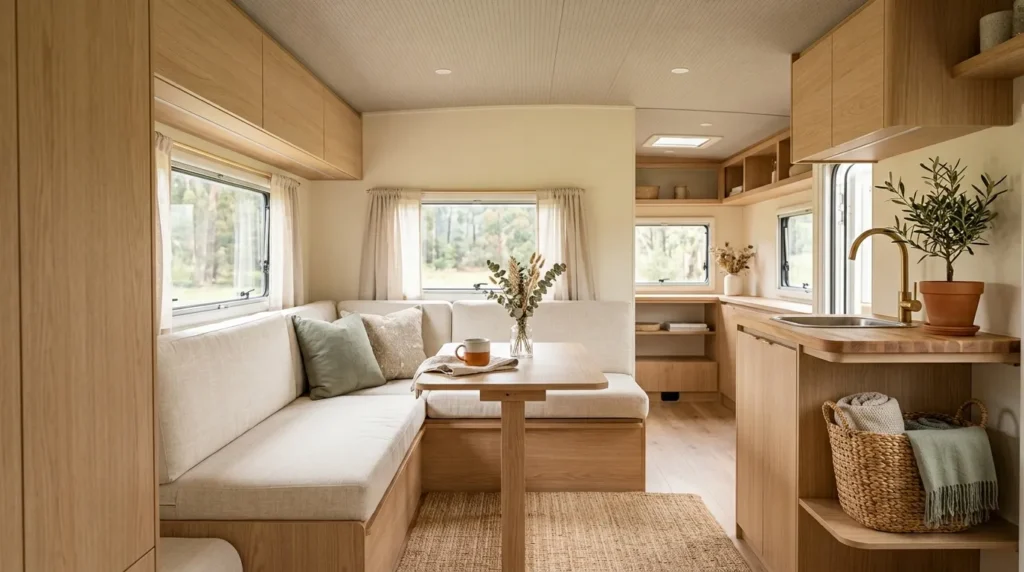
Quick Benefits
- Creates a calm, cohesive atmosphere
- Works with many decor styles
- Makes a small camper feel polished
- Adds subtle texture
- Provides an easy backdrop for colorful accessories
Why It Works
If you want a ceiling that feels finished without becoming the main feature, soft neutral panels are an excellent middle ground. Instead of bright white or strongly patterned materials, a warm neutral surface can create a gentle transition between the ceiling and the rest of the camper.
Colors such as warm ivory, soft beige, pale greige, and light taupe can make an interior feel comfortable without visually shrinking it.
This approach is particularly useful when your camper already contains several different materials. Perhaps you have wood cabinetry, patterned upholstery, metal hardware, and colorful accessories. A quiet neutral ceiling can help visually connect those elements.
Texture can be just as important as color. A lightly embossed, woven-looking, or subtly paneled surface can prevent the ceiling from appearing flat while maintaining the calm palette.
I’ve found that neutral finishes are also easier to live with long term. You can change bedding, curtains, or accessories without worrying that the ceiling will suddenly clash.
How To Style It
Choose a lightweight panel in a warm neutral shade and keep the finish relatively subtle. If the camper has low ceilings, avoid dramatic borders or high-contrast patterns.
Pair the ceiling with cream or beige upholstery, natural wood accents, and simple textiles. If you want more color, introduce it through removable accessories such as cushions, towels, curtains, or bedding.
Warm lighting works particularly well with soft neutrals. Consider several small light sources instead of relying on one harsh overhead fixture if your camper’s electrical and fixture setup allows it.
For a modern look, use black or brushed-metal accents. For a softer interior, warm bronze or brass can complement beige and ivory beautifully.
The goal is a layered neutral palette rather than a completely monochromatic room. Slight differences in texture and tone keep the interior interesting while maintaining a sense of calm.
Before installation, make sure the panels are suitable for the camper environment and do not add excessive weight. Preserve all required access points and ventilation openings.
9. Rustic Cabin Finish
Quick Benefits
- Creates a cozy getaway atmosphere
- Works beautifully for camping-focused interiors
- Adds natural visual warmth
- Complements wood cabinetry
- Makes the camper feel more personalized
Why It Works
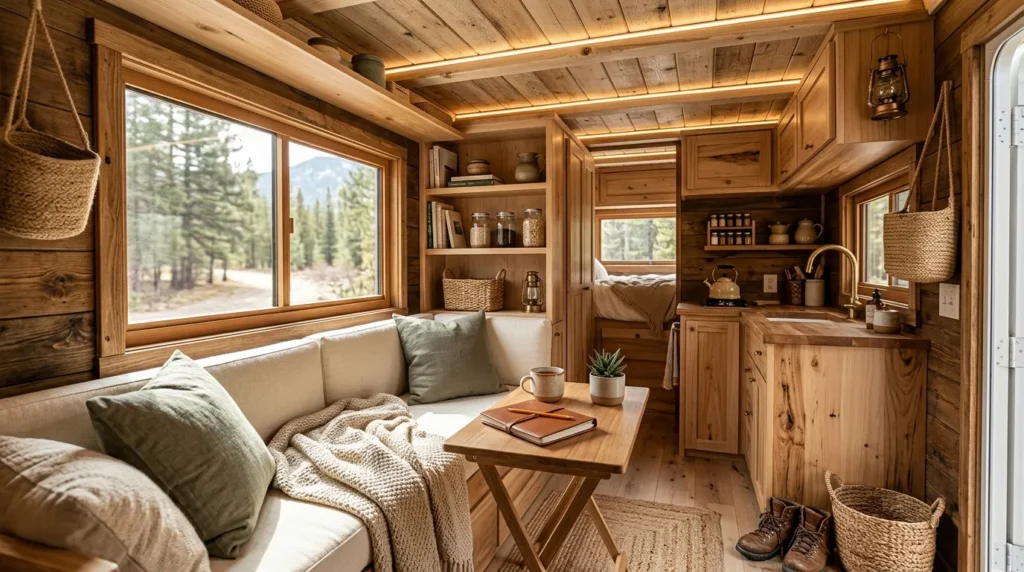
A rustic cabin-inspired ceiling can make a tiny camper feel like a miniature retreat in the woods. The look works particularly well for travelers who enjoy camping, hiking, fishing, mountain trips, or spending time surrounded by nature.
The key is using rustic elements thoughtfully. You don’t need dark wood everywhere or a collection of cabin-themed decorations. A warm wood-look ceiling paired with simple neutral furnishings can create the feeling without making the interior feel dated.
Light and medium wood tones are usually more versatile than very dark finishes. They retain the cozy character while allowing the camper to remain bright.
You can also introduce rustic charm through subtle variation in the material. A lightly weathered or natural-looking finish can add character while still looking polished.
The ceiling can become the connection between the outdoors and the interior. When paired with natural textiles, earthy colors, and warm lighting, it creates a welcoming environment after a long day outside.
How To Style It
Choose a lightweight wood-look ceiling material in a natural pine, oak, cedar-inspired, or softly weathered finish. If the camper is very small, favor lighter tones to prevent the ceiling from visually lowering the space.
Pair it with cream, oatmeal, sage, muted brown, or dusty blue textiles. These colors reinforce the outdoor-inspired feeling without turning the camper into a themed cabin.
A woven blanket, small leather accent, or natural wood tray can provide additional character. Keep decorative objects limited because the ceiling already establishes the rustic mood.
Warm lighting is essential. Soft warm-white LEDs can make wood tones feel inviting in the evening without producing an overly yellow appearance.
If the cabinetry is already wood, don’t worry about achieving an exact match. Similar undertones are often enough to create harmony.
Most importantly, verify that your chosen material is lightweight and properly secured for mobile use. A ceiling treatment needs to remain stable through vibration, temperature changes, and regular travel.
10. Reflective Bright Finish
Quick Benefits
- Helps bounce available light around the camper
- Makes a tiny interior feel more open
- Works especially well in darker campers
- Creates a clean and polished appearance
- Complements both modern and traditional decor
Why It Works
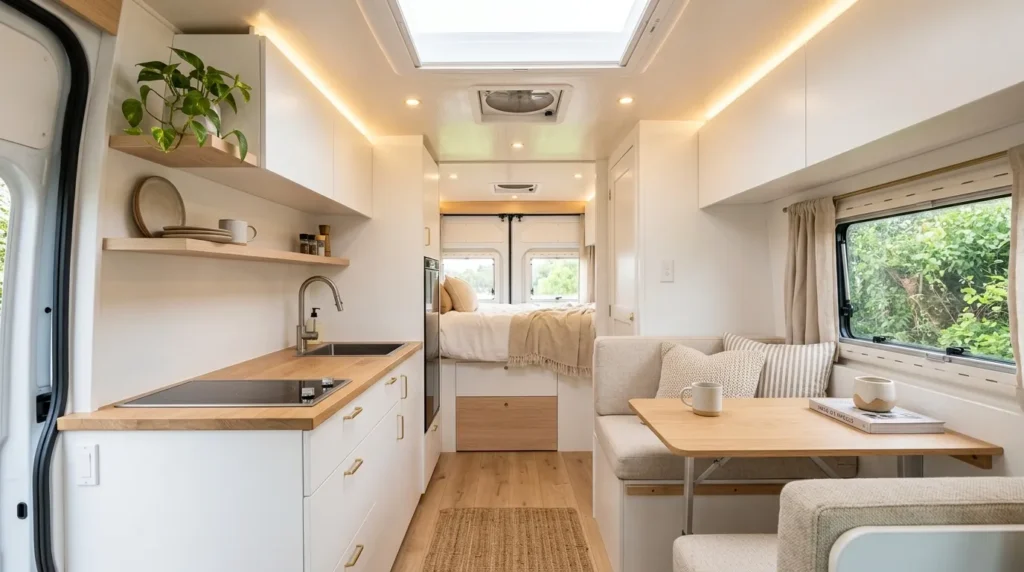
When a camper feels dark, the ceiling is one of the first surfaces worth considering. A bright finish can help distribute available light throughout the interior, which is especially valuable when windows are small or the camper relies heavily on artificial lighting.
This doesn’t mean the ceiling needs to be glossy. In fact, an extremely reflective surface can create distracting glare and emphasize imperfections. A clean satin, eggshell, or softly reflective finish can provide a better balance.
Light colors are usually the most effective. Warm white, soft ivory, and very pale neutral tones can make the ceiling feel brighter without creating a stark contrast against the rest of the interior.
This approach works particularly well when paired with strategically placed lighting. The goal isn’t simply to make the ceiling brighter; it’s to create a more comfortable overall light environment.
If your camper has dark cabinetry or flooring, a bright ceiling can also prevent the room from feeling visually enclosed.
How To Style It
Start with a clean, light-colored ceiling surface. Warm white is usually the easiest option because it reflects light while maintaining a welcoming appearance.
If you’re replacing the existing material, consider a smooth lightweight panel with a subtle satin appearance. If you’re repainting, choose a coating compatible with the existing ceiling material and follow the manufacturer’s preparation instructions.
Pair the ceiling with light-colored curtains and upholstery if you want to maximize the airy effect. You can still use darker accents, but balance them with plenty of cream, white, or beige.
Lighting placement is important. Keep existing fixtures unobstructed and consider whether additional appropriately installed lighting could improve darker areas.
Avoid highly glossy finishes that create strong reflections or make small imperfections more obvious.
For evening use, warm-white LEDs can make the bright ceiling feel cozy rather than clinical. During the day, keep window areas as open as practical so natural light can contribute to the effect.
The result should feel brighter and more comfortable rather than simply more reflective.
11. Layered Lighting Detail
Quick Benefits
- Makes the ceiling more functional
- Improves the camper’s evening atmosphere
- Adds visual interest without taking floor space
- Highlights architectural ceiling details
- Creates a more finished interior
Why It Works
A ceiling makeover doesn’t always have to be about changing the entire surface. Sometimes the biggest improvement comes from combining a simple ceiling refresh with thoughtful lighting.
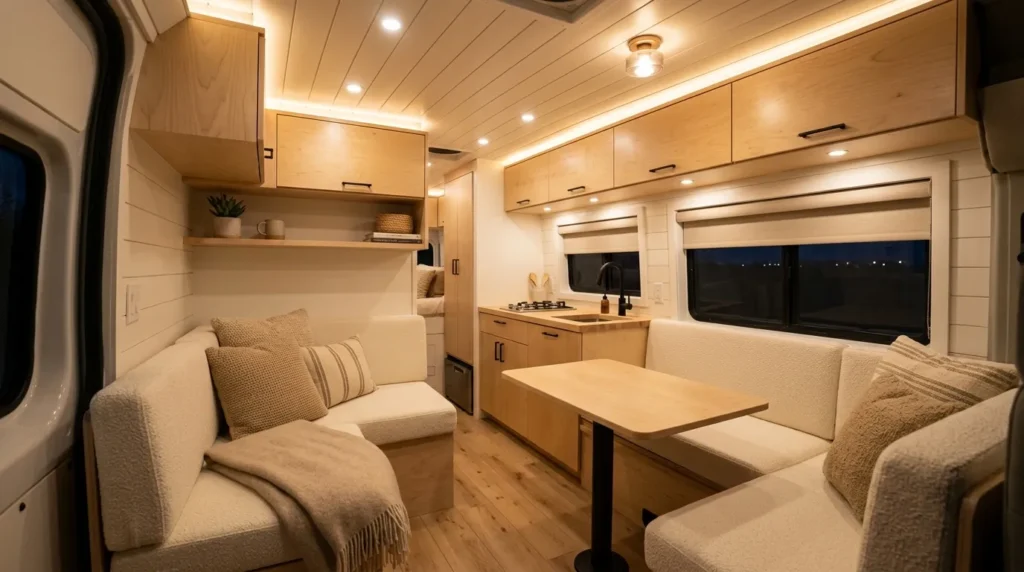
In a tiny camper, lighting has an outsized effect because there are fewer surfaces and fixtures to work with. A single harsh overhead light can make the interior feel flat, while several appropriately installed light sources can create a softer, more comfortable atmosphere.
You might pair a bright ceiling with small recessed-style fixtures where appropriate, slim surface-mounted lights, or other RV-compatible lighting solutions. The exact setup depends on the camper’s existing electrical system and what modifications are safe and practical.
The ceiling finish also influences how the light behaves. A light neutral surface can distribute illumination, while warm wood can soften it.
I’ve noticed that the most inviting camper interiors often have more than one lighting level. Bright task lighting is useful when cooking or cleaning, while softer ambient lighting is much more relaxing in the evening.
How To Style It
Start by considering how you actually use the camper after dark. Identify areas that need stronger illumination and areas that would benefit from softer ambient light.
If your existing fixtures are outdated, replacing them with appropriately rated RV lighting can make the ceiling feel refreshed without a major structural change. Choose fixtures that suit the ceiling material and overall decorating style.
For a warm modern camper, combine a light ceiling with simple black or brushed-metal fixtures. For a cabin-inspired interior, warm wood tones and understated fixtures create a cozy combination.
Avoid placing too many decorative fixtures overhead. A tiny camper can quickly feel crowded when the ceiling is filled with hardware.
Keep vents, fans, detectors, and service access completely unobstructed. Electrical changes should be handled according to the applicable manufacturer’s instructions and, when necessary, by a qualified professional.
Finally, think about color temperature. Warm-white lighting generally creates a more relaxed evening atmosphere, while brighter neutral lighting can be useful for tasks.
The best ceiling isn’t simply beautiful—it makes the entire camper easier and more pleasant to use.
Frequently Asked Questions
What is the best color for a tiny camper ceiling?
Light colors are generally the easiest choice for a tiny camper ceiling. Warm white, soft ivory, pale beige, and light greige can help the interior feel brighter and more open. If your camper already has warm wood cabinetry, an ivory or soft white ceiling can create a balanced contrast without making the space feel stark.
Can you put wood on a camper ceiling?
You can create a wood ceiling appearance in a camper, but the material needs to be selected carefully. Lightweight wood-look panels, thin planks, or other RV-appropriate materials can provide the appearance of wood without unnecessary weight. Always check the product’s weight, installation requirements, and compatibility with the existing ceiling before beginning a project.
How can I make my camper ceiling look taller?
A light-colored ceiling, minimal visual clutter, and strategically planned lines can help a tiny camper feel more open. Vertical or lengthwise design elements may draw the eye through the space, while a bright ceiling can reflect available light. Avoid very dark colors and overly busy patterns if your primary goal is creating a more spacious feeling.
Is shiplap a good idea for a camper ceiling?
Lightweight shiplap-style panels can be a good decorative option for a camper ceiling when properly selected and installed. They add texture and farmhouse character without requiring additional decor. Because campers are mobile, avoid assuming that standard heavy construction materials are suitable. Choose an appropriate lightweight product and preserve access to vents, lights, wiring, and other components.
What is the easiest way to update an old camper ceiling?
Painting may be one of the simplest options when the existing ceiling is structurally sound and compatible with the chosen coating. Cleaning, repairing suitable surfaces, priming when required, and applying a compatible finish can create a significant visual improvement. If there is staining, sagging, moisture damage, or other structural concerns, address the underlying issue before applying a cosmetic finish.
How do I make a camper ceiling feel less boring?
Texture is an easy way to add interest without taking up space. Lightweight wood-look planks, subtle shiplap, soft neutral panels, small-scale wallpaper, or a carefully chosen paint color can all create more personality. Lighting can also make a major difference because it changes how the ceiling and surrounding surfaces appear throughout the day.
Should a camper ceiling be lighter than the walls?
It doesn’t have to be, but a lighter ceiling can be helpful in a compact camper. Using a lighter overhead surface can create visual separation and reflect more light, particularly when the walls or cabinetry are darker. If you prefer a dramatic ceiling, keep the rest of the interior relatively light and uncluttered to maintain balance.
Conclusion
A tiny camper doesn’t need a complicated renovation to feel fresh and inviting. Sometimes the most noticeable improvement comes from looking at an overlooked surface and giving it a little attention. The ceiling is a perfect example.
Whether you prefer warm wood planks, crisp white panels, subtle wallpaper, farmhouse-inspired shiplap, natural textures, or a modern slatted design, the right treatment can help your camper feel more intentional and comfortable. The best choice will depend on your existing interior, available light, personal style, and how much work you’re willing to take on.
Practicality should always remain part of the design conversation. Before installing anything overhead, consider weight, moisture, ventilation, lighting, electrical components, access panels, and the movement your camper experiences on the road. A beautiful ceiling is only successful when it remains safe, functional, and durable.
You also don’t have to complete an entire makeover at once. Start with the area that bothers you most. A fresh light finish, a little texture, or better lighting may be enough to change the way the whole interior feels.
Your camper may be tiny, but it can still have plenty of personality. Choose a ceiling treatment that makes you happy to step inside after your next adventure, and let the rest of your decor build naturally around it.
Related Articles
- 11 Camper Shower Curtain Ideas to Freshen Up Your Tiny Camper
- 10 Camper Window Treatment Ideas for a Cozy RV Interior
- 11 Small Camper Storage Ideas That Save Space
- 10 Cozy Camper Interior Ideas for a Tiny RV
- 11 Camper Decor Ideas for a Stylish Home on Wheels