10 Camper Window Treatment Ideas to Freshen Up Your Tiny Camper
Nothing dates a camper faster than the window treatments it came with. In my experience, most stock RV curtains and blinds are chosen for cost and durability during manufacturing, not for style — which means even a camper with a beautifully renovated interior can still feel dark, dingy, or dated if the original mini blinds or heavy vinyl curtains are still hanging in front of every window.
If you’re anything like me, you’ve probably scrolled through camper renovation photos on Pinterest and wondered how those tiny, cramped windows end up looking so bright and intentional. A lot of it comes down to window treatments specifically, since in a space this small, the windows make up a much larger percentage of the visible wall area than they would in a full-size home. Get that detail right, and the whole camper feels lighter and more finished almost instantly.
A mistake many camper owners make is choosing window treatments based purely on blackout capability, without considering how heavy fabric or bulky hardware will look and function in such a tight space. That’s why many RV renovators recommend prioritizing lightweight, low-profile solutions first, then layering in blackout capability only where it’s genuinely needed — like the bedroom windows — rather than defaulting to heavy blackout everywhere.
I’ve noticed that the camper interiors people save most often on Pinterest share a similar approach to windows: a light, breathable primary treatment for daytime privacy and softness, paired with a more functional blackout layer that can be added or removed depending on where you’re parked and how much light control you actually need that night.
In this guide, I’m sharing ten camper window treatment ideas that work in the tight, curved, and often oddly-shaped windows typical of travel trailers, tiny campers, and van conversions. Each idea includes practical guidance on materials, hardware, and installation so you can actually picture how it would work in your own rig.
Table of Contents
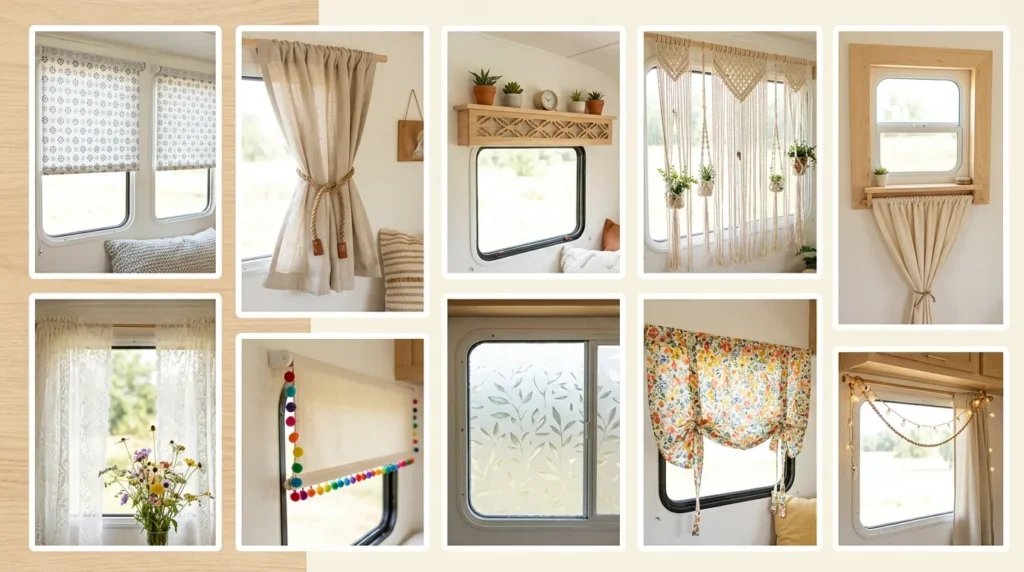
- Roman Shade Swap A tailored, space-saving alternative to bulky mini blinds.
- Café Curtain Panels A classic, breezy look for lower window coverage.
- Roller Shade Upgrade A clean, minimal option for consistent light control.
- Magnetic Blackout Panels A removable, no-hardware solution for sleeping areas.
- Bohemian Macramé Valance A textured, decorative topper for a personalized look.
- Tension Rod Curtain Set A budget-friendly, no-drill installation option.
- Honeycomb Cellular Shades An insulating upgrade for temperature control.
- Sheer Linen Panels A soft, airy look for maximum natural light.
- Reflective Insulated Curtains A functional layer for extreme temperature days.
- Custom Fabric Snap Curtains A fully personalized, semi-permanent camper solution.
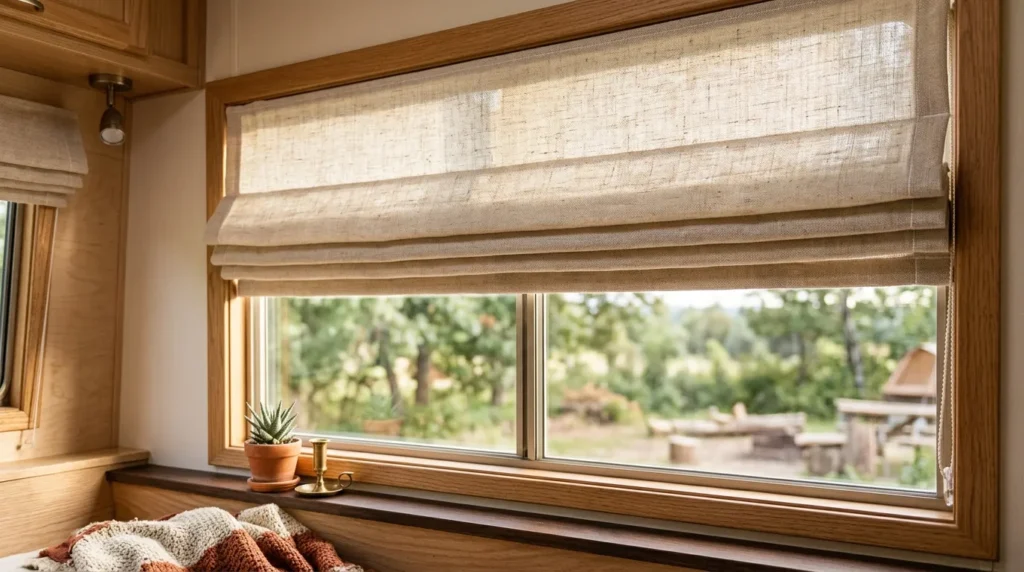
1. Roman Shade Swap
Quick Benefits
- Tailored, streamlined look
- Stacks compactly when raised
- Works well on standard rectangular RV windows
- Available in a wide range of fabrics
- Elevates a camper instantly compared to mini blinds
Why It Works
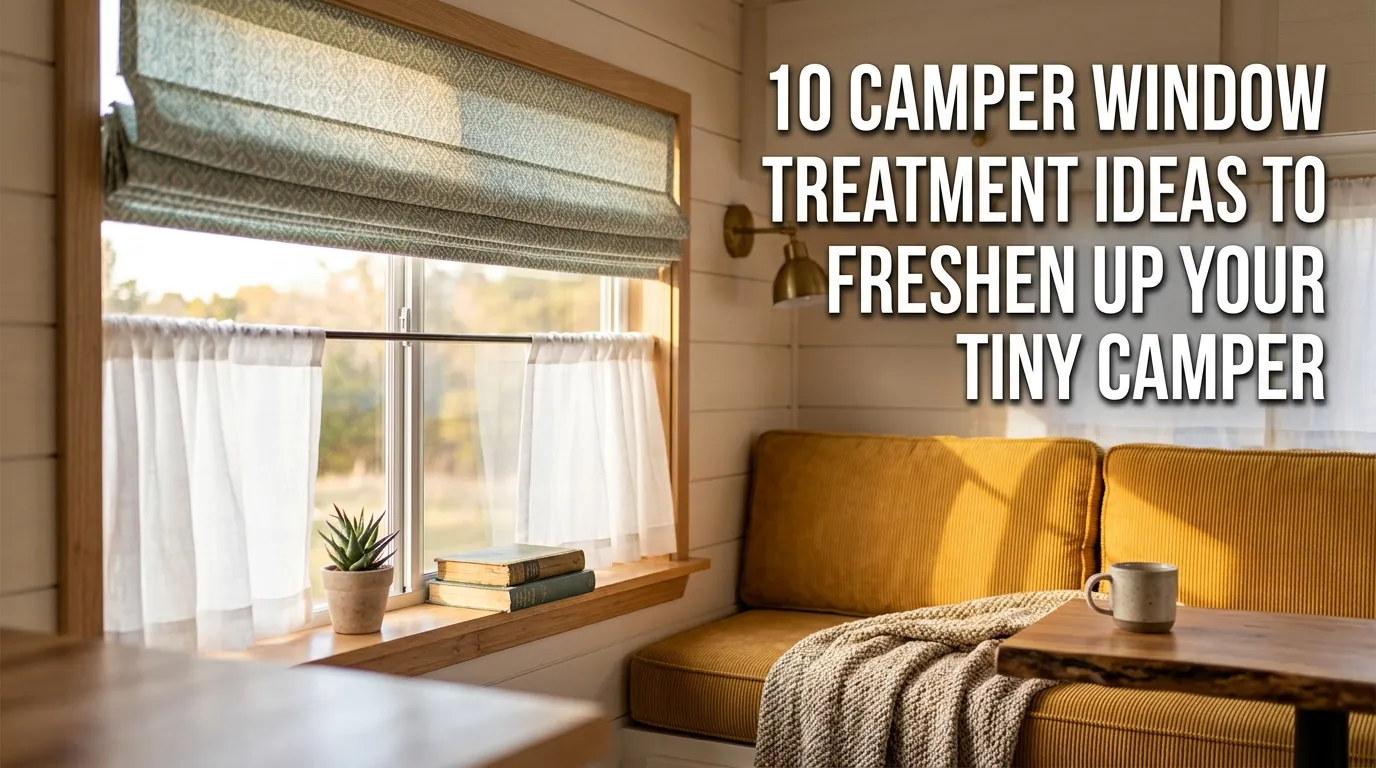
Swapping stock mini blinds for fabric roman shades is one of the single most transformative camper window treatment ideas, largely because it eliminates the dated, plasticky look that so many stock RV windows share. In my experience, this is the upgrade that gets the most immediate compliments after a camper renovation, since roman shades read as intentional and tailored in a way that mini blinds simply don’t, regardless of how clean or well-maintained the blinds are. They also stack up compactly when raised, which matters in a space where every inch of window sightline counts.
How To Style It
Measure the existing window opening carefully, accounting for any curve in the frame that’s common in RV windows, and order or sew a roman shade sized to mount either inside or just outside the window frame. Lightweight cotton or linen-blend fabric works best for keeping the shade easy to raise and lower without excess bulk when stacked. Mount using a simple tension rod or small screw-in brackets at the top of the window, and add a cord lock or hook-and-loop tie at the bottom for securing the shade fully open while driving. This upgrade pairs especially well with the magnetic blackout panel idea below for windows that need both a decorative and functional layer.
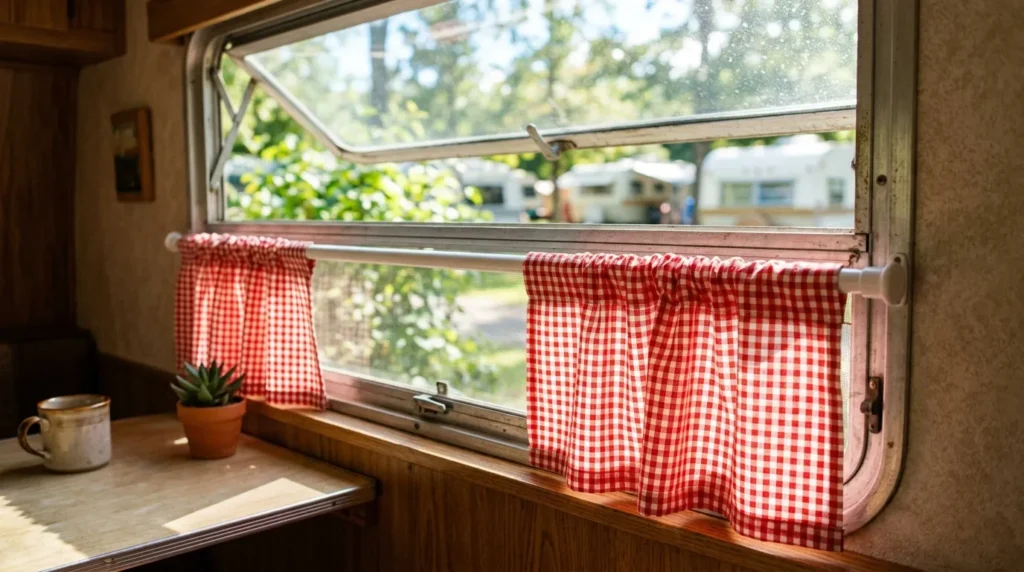
2. Café Curtain Panels
Quick Benefits
- Classic, breezy camper aesthetic
- Allows light in while still offering privacy
- Simple no-sew installation options available
- Works well on smaller, lower windows
- Budget-friendly fabric requirement
Why It Works
Café curtains — short panels that cover roughly the lower half of a window — bring a classic, breezy charm that suits the camper aesthetic particularly well, since they allow natural light to fill the upper portion of the space while still offering privacy at eye level. That’s why many RV renovators recommend this style specifically for kitchen and dinette windows, where full coverage often isn’t necessary but some privacy from ground-level passersby at a campsite is still appreciated. I’ve seen this idea transform dark, closed-off camper kitchens into spaces that feel noticeably brighter and more open.
How To Style It
Use a lightweight cotton or gingham fabric in a length that covers roughly the bottom half to two-thirds of the window, hemmed with a simple rod pocket at the top. Mount on a thin tension rod positioned at the midpoint of the window frame, which requires no drilling and can be easily removed for cleaning or seasonal swaps. Pair with a coordinating tieback for daytime styling, allowing the panel to be pulled fully open when extra light or a view is wanted. This style works especially well in vintage-inspired or retro camper renovations, where the classic gingham or floral print reinforces the overall theme.
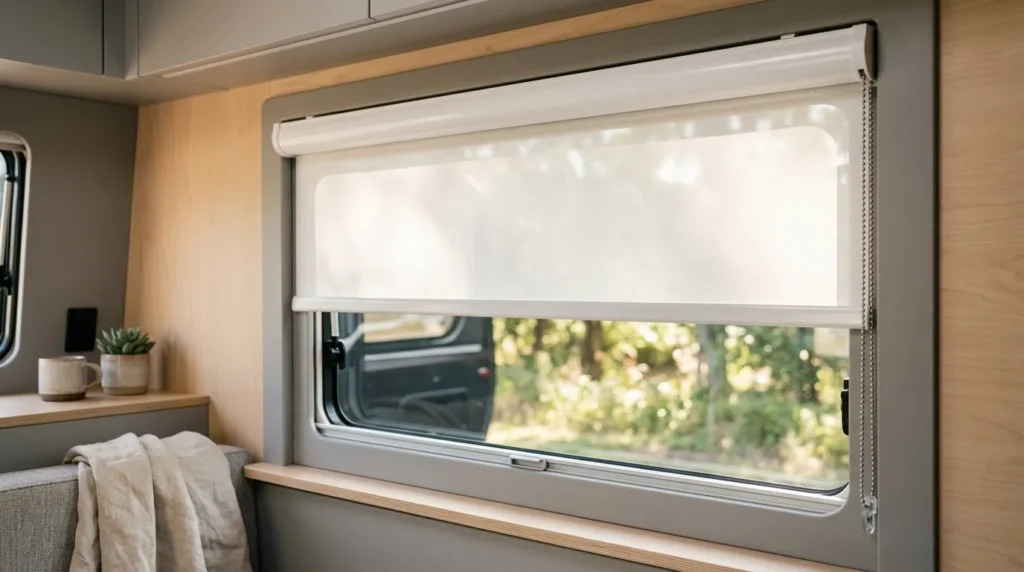
3. Roller Shade Upgrade
Quick Benefits
- Extremely clean, minimal look
- Consistent light control at any height
- Low-profile when fully raised
- Works well in modern camper renovations
- Widely available in cordless, RV-safe versions
Why It Works
A roller shade offers some of the cleanest, most minimal window coverage available for a camper, rolling up into a slim cylinder at the top of the window rather than stacking bulky fabric or slats. One thing that works especially well about roller shades in a camper specifically is the precise light control they offer — the shade can be positioned at any height rather than only fully open or fully closed, which matters in a small space where controlling glare without sacrificing all the light is often the goal. This upgrade tends to suit modern, minimalist camper renovations particularly well.
How To Style It
Choose a cordless roller shade, both for safety while traveling and to avoid dangling hardware that can catch on cabinets or vibrate loose over rough roads. Light-filtering fabric works well for daytime windows, while a blackout-lined roller shade suits bedroom or sleeping nook windows specifically. Mount using small brackets at the top of the window frame, checking that the shade clears any window crank or lock hardware common in RV windows before finalizing placement. This idea pairs particularly well with a simple café curtain layered underneath for texture, giving both a functional and decorative element to the same window.
4. Magnetic Blackout Panels
Quick Benefits
- No drilling or hardware required
- Fully removable for daytime light
- Excellent for total darkness while sleeping
- Works on the metal window frames common in RVs
- Easy to store when not in use
Why It Works
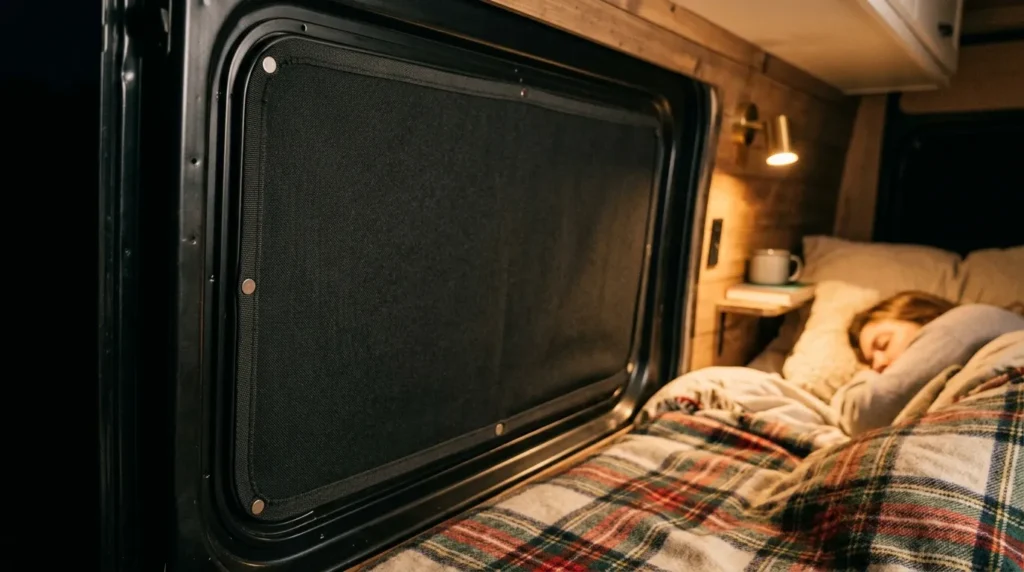
Magnetic blackout panels take advantage of the metal window frames found in most travel trailers and campers, using magnetic strips along the edges to hold a blackout fabric panel in place without any drilling, adhesive, or hardware installation. I’ve noticed this has become one of the most popular camper window treatment ideas specifically for full-time and frequent travelers, since the panels can be quickly installed at bedtime and just as quickly removed and stored during the day, keeping the primary window treatment underneath unobstructed for regular use.
How To Style It
Cut blackout fabric to size for each window, adding a couple of inches of overlap on all sides, then attach adhesive-backed magnetic strips or sew magnetic tape directly into the fabric edges. Press the panel firmly against the metal window frame to secure it in place; most magnetic panels create a near-complete seal against light when properly fitted. Store unused panels in a slim fabric bin or slide them behind a cushion when not in use, since they don’t need to remain mounted during the day the way a permanent shade would. This idea works especially well paired with a lighter primary treatment, like café curtains or a roller shade, for full flexibility.
5. Bohemian Macramé Valance
Quick Benefits
- Adds texture and personality
- Works well combined with a functional shade
- Lightweight and easy to hang
- Highly Pinterest-friendly decorative detail
- Budget-friendly DIY option
Why It Works
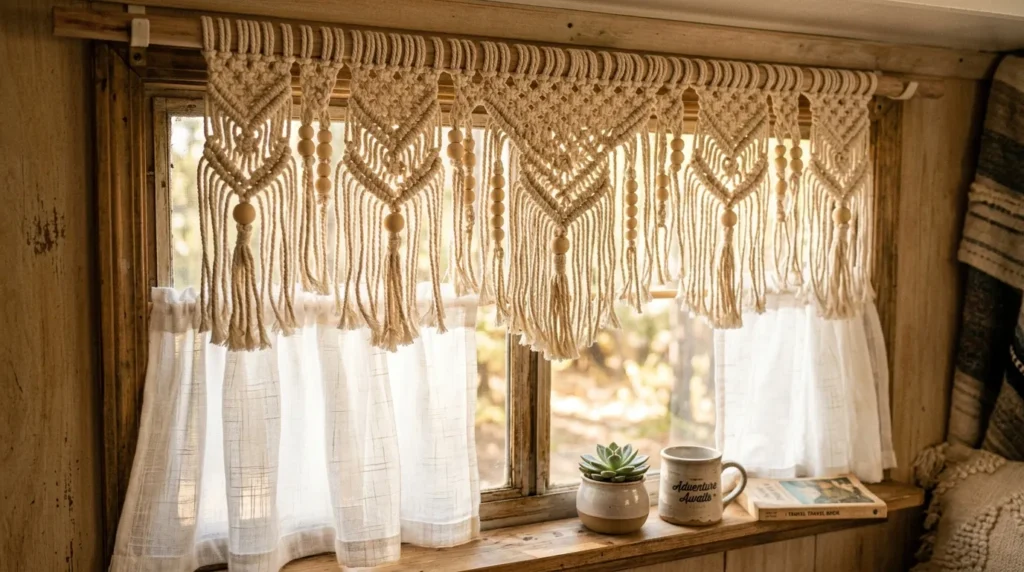
A macramé valance doesn’t offer much in the way of privacy or light control on its own, but it adds a layer of texture and personality that most stock camper windows are missing entirely. That’s why many RV renovators recommend pairing a decorative valance like this with a more functional treatment underneath, using the macramé purely for visual interest rather than asking it to do the work of an actual curtain. I’ve seen this idea transform plain, functional-only windows into a genuine design feature, especially in boho or vintage-styled camper renovations.
How To Style It
Hang a purchased or DIY macramé valance from a thin dowel or curtain rod at the very top of the window frame, positioned above whatever primary treatment — a roller shade or café curtain — is doing the actual privacy work. Keep the valance relatively short, covering just the top four to six inches of the window, so it doesn’t interfere with visibility or light when the primary treatment is open. Natural cream or off-white cotton cord tends to photograph best against most camper interior finishes, though a small pop of color in wooden beads or tassels adds a nice accent detail.
6. Tension Rod Curtain Set
Quick Benefits
- No drilling required
- Extremely budget-friendly
- Quick to install and remove
- Ideal for rented or leased campers
- Flexible for seasonal fabric swaps
Why It Works
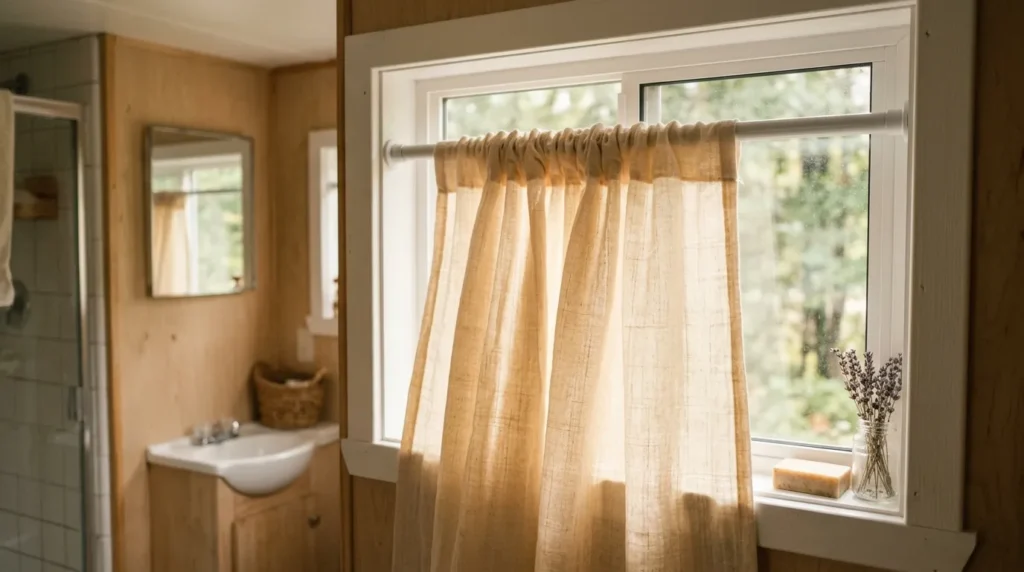
A basic tension rod curtain setup remains one of the most practical camper window treatment ideas simply because it requires no permanent modification to the camper at all — a real advantage for anyone renting, leasing, or planning to sell the rig down the line. A mistake many camper owners make is assuming a tension rod setup has to look temporary or unfinished, but with the right fabric and a properly sized rod, this option can look just as intentional as a permanently mounted treatment while remaining fully removable.
How To Style It
Choose a spring tension rod sized precisely to the interior width of the window frame, and hem lightweight curtain fabric with a rod pocket sized to fit snugly around it. Cotton, linen-blend, or a light poly-blend fabric all work well, since heavier fabrics can put too much strain on a tension rod’s grip over time, especially while driving on rough roads. This setup works well on nearly every window type in a camper, from small bathroom windows to larger dinette windows, and can be swapped seasonally or when redecorating without any lasting commitment to a single fabric choice.
7. Honeycomb Cellular Shades
Quick Benefits
- Adds real insulation value
- Reduces heat gain and loss through windows
- Clean, low-profile appearance
- Helps regulate interior temperature
- Reduces outside noise slightly
Why It Works
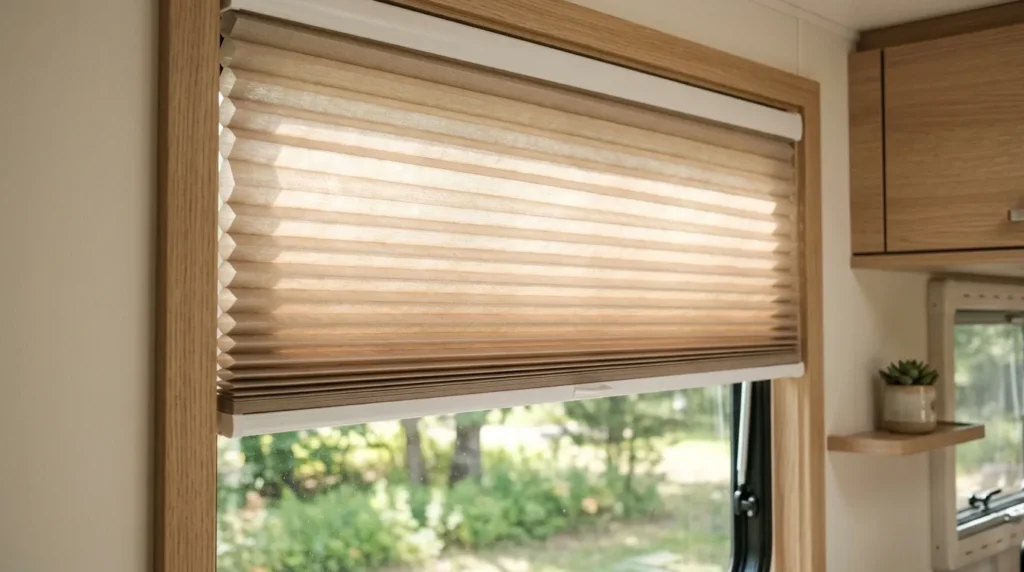
Honeycomb cellular shades bring genuine functional value to a camper beyond privacy and light control, since their cellular structure traps a layer of air that helps insulate against both heat and cold coming through the glass. In my experience, this is a particularly worthwhile upgrade for anyone who camps in extreme temperatures, since RV windows are typically far less insulated than a standard home window, making them one of the biggest sources of temperature loss in a small space. That’s why many RV renovators recommend this option specifically for full-time travelers or anyone camping through varied climates.
How To Style It
Measure each window carefully and order cordless cellular shades sized for a tight fit, since gaps around the edges reduce the insulating benefit the shades are meant to provide. Light-filtering versions work well for daytime windows, while a blackout cellular shade in the bedroom area offers both insulation and full darkness in one product. Mount using the included top-mount brackets, checking clearance against any RV-specific window hardware first. This upgrade tends to cost more upfront than fabric-based treatments, but the added insulation can noticeably improve comfort during particularly hot or cold camping trips.
8. Sheer Linen Panels
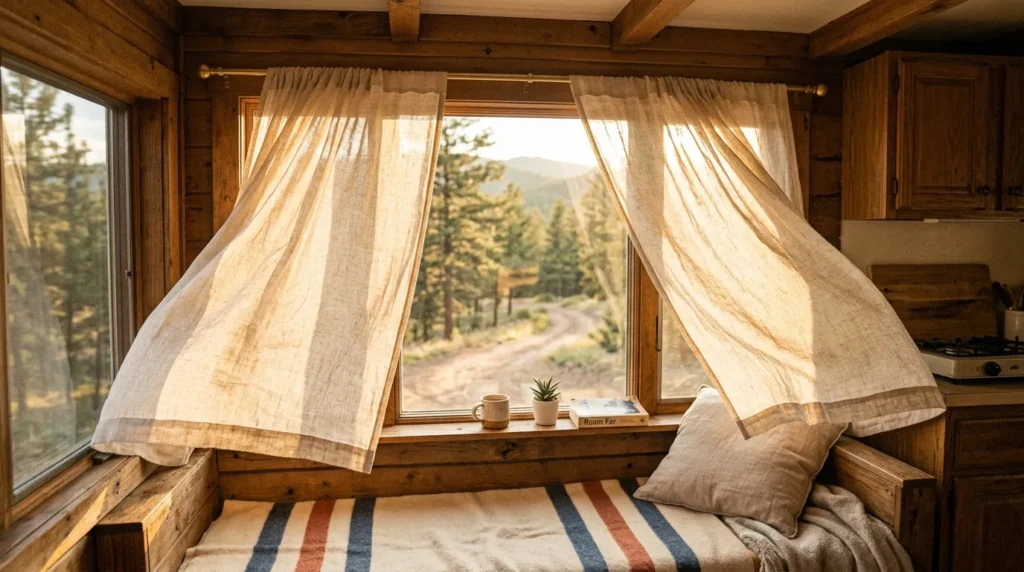
Quick Benefits
- Soft, airy daytime look
- Maximizes natural light
- Lightweight and easy to hang
- Elevates a camper’s interior significantly
- Works beautifully layered with blackout panels
Why It Works
Sheer linen panels bring a soft, filtered quality to camper light that feels closer to a real home than a typical RV interior, all while still providing a layer of privacy from direct outside views. One thing that works especially well about sheers in a camper specifically is how much lighter and larger the space feels once heavy stock curtains are replaced with something this airy — in a small footprint, that shift in perceived space is often more noticeable than it would be in a full-size home. I’ve seen this idea transform cramped-feeling camper interiors into spaces that photograph and feel significantly more open.
How To Style It
Hang lightweight linen or linen-blend sheer panels from a slim curtain rod or tension rod, allowing a small amount of extra fabric width for a soft, gathered look rather than a flat, stretched panel. Sheers work best as a primary daytime treatment paired with a magnetic blackout panel or roller shade for nighttime privacy and darkness, since sheers alone don’t offer meaningful coverage after dark with interior lights on. Natural, undyed linen tends to photograph best against most camper interior finishes, keeping the overall palette calm and cohesive.
9. Reflective Insulated Curtains
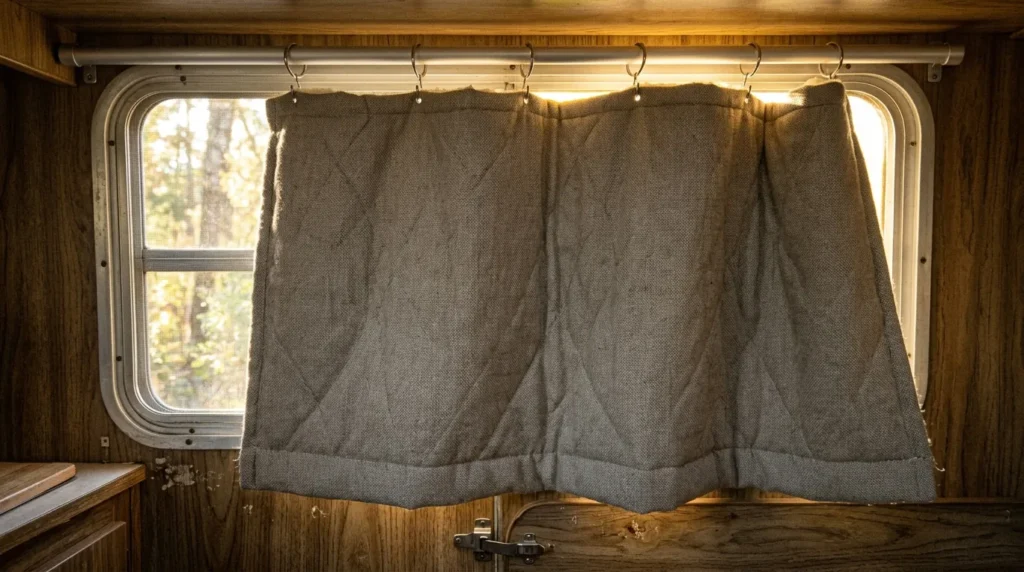
Quick Benefits
- Blocks significant heat from direct sun
- Doubles as blackout coverage
- Budget-friendly compared to cellular shades
- Easy to source and install
- Effective in extreme summer heat
Why It Works
Reflective insulated curtains, often lined with a metallic or foil-backed layer, are specifically designed to bounce direct sunlight away from a window rather than simply blocking it, which makes a noticeable difference in campers parked in full sun during summer months. That’s why many full-time RV travelers recommend this option specifically for west-facing or frequently sun-exposed windows, where standard blackout fabric alone doesn’t fully address the heat coming through the glass, only the light.
How To Style It
Choose a reflective, foil-backed insulated curtain fabric, either purchased pre-made for RV use or sewn using insulated lining fabric combined with a decorative outer layer. Mount using the same tension rod or bracket approach as any other curtain style, ensuring full coverage of the window frame for the best heat-blocking effect. This treatment tends to look more utilitarian than decorative, so it pairs well layered behind a lighter sheer or café curtain that provides the primary daytime look, reserving the reflective layer for the hottest parts of the day or for extended parking in direct sun.
10. Custom Fabric Snap Curtains
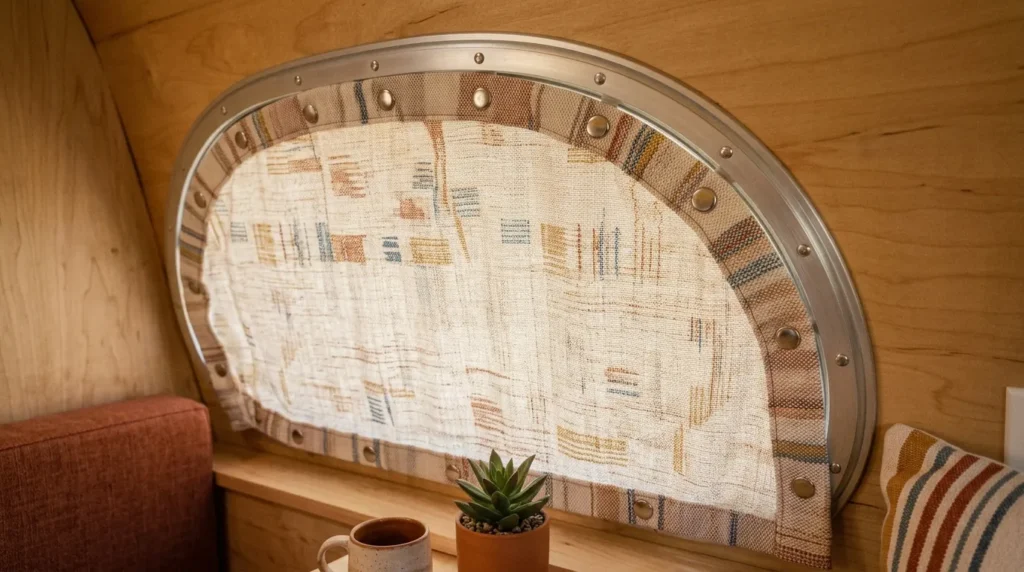
Quick Benefits
- Fully custom, personalized look
- Semi-permanent, secure installation
- Works well for oddly shaped RV windows
- Withstands road vibration better than clips
- High-end, tailored finished appearance
Why It Works
Snap-in curtains, secured with fabric snaps sewn directly into the panel and mounted to matching snaps installed around the window frame, offer one of the most secure and tailored-looking camper window treatment options available. I’ve noticed this approach works particularly well for the oddly shaped or curved windows common in older campers, where a standard rod-mounted curtain doesn’t always hang cleanly. Because the panel snaps directly into place at multiple points, this method also holds up noticeably better against the vibration and movement of driving compared to a curtain that simply hangs from a rod.
How To Style It
Measure the window carefully, including any curve at the top corners, and have panels custom sewn — either by a local upholsterer or via a DIY sewing project — to match the exact window shape. Install matching snap fasteners around the interior window frame at even intervals, then attach the corresponding snaps sewn into the curtain panel. This method works especially well for a fully custom, cohesive camper renovation where every window uses matching or coordinating fabric, giving the whole interior a intentional, professionally finished look rather than a mix of temporary solutions.
Frequently Asked Questions
What’s the best window treatment for a small camper? Lightweight roman shades or roller shades tend to work best in small campers, since they stack compactly and don’t add bulk to already-limited wall space. Pairing a light daytime treatment with a removable blackout layer is a popular approach for maximum flexibility.
How do I block light completely in a camper for sleeping? Magnetic blackout panels or blackout-lined roller and cellular shades are the most effective options for full darkness, since they can create a tight seal around the window frame. Reflective insulated curtains also help block both light and heat for very sunny conditions.
Can I remove stock RV mini blinds without professional help? Most stock mini blinds are held in place with a few screws at the top mounting bracket and can typically be removed with a basic screwdriver. Always check for wiring or additional hardware hidden behind the blinds before removing them completely.
What fabric works best for camper curtains? Lightweight cotton, linen-blend, or poly-blend fabrics tend to work best, since they’re easy to hang, don’t add excess bulk, and hold up well to the vibration and movement of travel. Heavier fabrics can strain lightweight hardware like tension rods over time.
Do magnetic blackout panels work on all camper windows? Magnetic panels work well on windows with metal frames, which is common in most travel trailers and campers, but may not adhere properly to windows with plastic or composite frames. Checking the frame material before purchasing magnetic strips is worth doing first.
How much does it cost to upgrade camper window treatments? Budget-friendly options like tension rod curtains or DIY magnetic panels can often be completed for under fifty dollars per window, while custom snap curtains or cellular shades tend to cost significantly more per window depending on size and material. Most campers can be fully updated somewhere in between, depending on the mix of treatments chosen.
Will new window treatments help with temperature control in a camper? Yes, particularly cellular shades and reflective insulated curtains, both of which are specifically designed to reduce heat transfer through the glass. Even simpler treatments like blackout curtains offer some minor insulating benefit compared to bare or poorly covered windows.
Final Thoughts
Window treatments are one of the most overlooked details in a camper renovation, but they’re also one of the highest-impact changes for the amount of effort involved. Whether you’re after the tailored look of roman shades, the practical flexibility of magnetic blackout panels, or the insulating benefit of cellular shades, small changes at the windows tend to transform the entire feel of a tiny camper.
Start with one or two ideas and gradually build a window treatment plan that reflects your travel style and supports the way you actually use the space — whether that’s chasing full darkness at a noisy campground or letting in as much natural light as possible on a quiet morning. Often it’s these small, functional swaps that make a camper feel less like a rental and more like a genuinely personal space.